
Here is a before and after of a kitchen that I rehabbed. This is nasty looking, but I have to say it is better then most that I have torn out or painted up. The window was replaced with a new vinyl sliding window. The soffit above the cabinets was removed and the light over the sink was moved strait up to the ceiling. To the left of the microwave, there was a 2′ wall (to cover the side of the stove) that was removed.
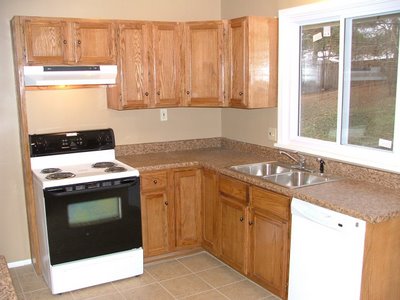
Everything here can be purchased at home depot. The cabinets are oak and you can stain them every how you want. They come individually. Just decide what sizes you need and screw them together. (Screw the backs into the wall, shim up the front to make it level, and put a short screw into the next cabinet. I usually take one of the hinge screws out, drill it deeper, than add a bigger screw.) Here minwax oak stain and a high gloss poly urethane was used. The counter top comes pre-cut with 45 degree cuts. I have found it the easiest to cut them for length by cutting on the back side of the tops (be sure to put masking tape on it to help avoid chipping). The end strips on the counter top are a pain, but I have found if you use liquid nails and clamp it, that works really well. Measure out you kitchen sink, mask it off, and cut it out with your saw. On your door hardware, make a jig, so the handles are all in the same spot. Minimal sheet rock work was done, the ceiling had to be retextured, and everything was painted. Finally,12″x12″ tile and new appliances were installed.

Everything here can be purchased at home depot. The cabinets are oak and you can stain them every how you want. They come individually. Just decide what sizes you need and screw them together. (Screw the backs into the wall, shim up the front to make it level, and put a short screw into the next cabinet. I usually take one of the hinge screws out, drill it deeper, than add a bigger screw.) Here minwax oak stain and a high gloss poly urethane was used. The counter top comes pre-cut with 45 degree cuts. I have found it the easiest to cut them for length by cutting on the back side of the tops (be sure to put masking tape on it to help avoid chipping). The end strips on the counter top are a pain, but I have found if you use liquid nails and clamp it, that works really well. Measure out you kitchen sink, mask it off, and cut it out with your saw. On your door hardware, make a jig, so the handles are all in the same spot. Minimal sheet rock work was done, the ceiling had to be retextured, and everything was painted. Finally,12″x12″ tile and new appliances were installed.
Leave a Reply